I’ve been an avid skater since I was a little kid. Since I took my first steps into Toys-R-Us, and had a go on one of those shite little boards with wheels the size of 20-pence-pieces, I’ve been hooked!
That may be a slight exaggeration, but It’s been quite a long time, certainly since becoming a teenager, so it’s safe to say that I have a fair bit of experience when it comes to cruising the streets and “scaring customers away from the local shops,” as my town’s community Facebook page has described me and my mates multiple times.
If you’ve been reading my blog for a while, you’ll notice a running theme, surfboards and skateboards appear quite often. The reason for this? Well, you could say I have a slight obsession with them.
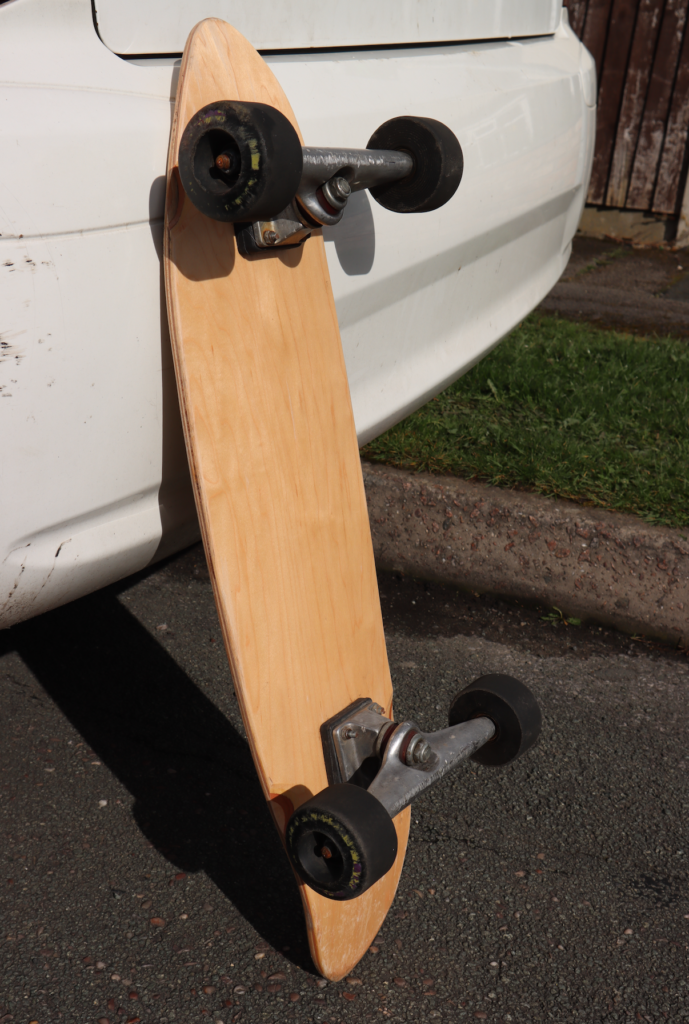
This ‘obsession’ lead me to a new endeavor the other day, while sat in my room mid lockdown, I suddenly had the urge to build a skateboard, but one quite unlike any I’ve had before…
In essence, I purchased a cheap deck from eBay, some bearings, clear grip tape, and dug out some old trucks and wheels from the garden shed. All the ingredients to build a pretty decent new skateboard… Right?
My new homemade cruiser skateboard is absolutely brilliant at going from rail-to-rail, and pumping. In fact, My mate and I took it out on a local estate, and all it needed was a single push, and I was going like a blue arsed fly!
You can see how well it carves around my local skatepark in the video above… I have a feeling it would perform much better with someone who is a wee bit better than I am though.
So, why would anyone want to make a Cruiser-style skateboard anyway? Well, it’s simple really…
If you’ve ever been out on a longboard you’ll know the glorious and satisfying feeling of gliding over soft pathways, and across cracks and potholes without any issue whatsoever. The unmatched speed, steadiness, and satisfaction of the longboard is, in my opinion, a very unique and fantastic experience. Longboards however suffer from one Massive issue…
The name Longboard isn’t an oxymoron, they really are quite large and cumbersome, as demonstrated while trying to navigate through crowds of people with one beneath your feet, or in your hands. You can expect your longboard to be between 40-60 inches long, compared to the relatively short 22-33 Inches of the standard skateboard.
But size doesn’t matter… Right?
So, in simple terms, you’d want a cruiser skateboard in order to have (most of) the aspects that make longboarding so great, just in a smaller, more manageable package!
Exited? I was too, until I saw the price of Cruiser skateboards online!
For a decent board, you’d be looking at a price range of between £85 and £200. That’s big money for something that you’re more than likely going to get covered in dust, dirt, and crap from the ground!
Unless Aldi decide to spice up the “Special buy” section with some cheap-o Cruiser skateboards, I’m afraid the cheapest you’ll be able to get is around £70. Which isn’t too bad to be fair, But I reckon I could come up with a better Board for a similar price. Let me explain how I’d do it…
Step 1. Decide On a Deck.
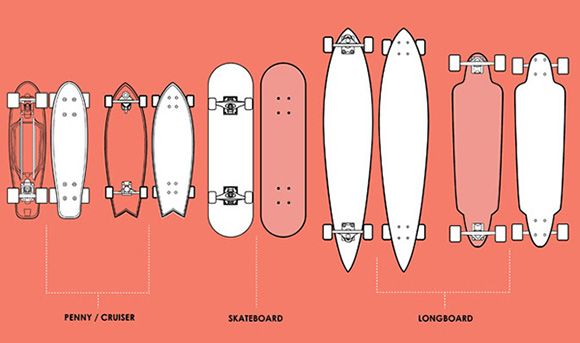
The deck is your home. It’s going to be supporting your weight as you take to the streets or hills, so you’ll want to have a pretty decent one. For the cruiser skateboard, I wouldn’t go for anything over 34 inches, as it kind of defeats the point of it being small and portable.
Things you want to look out for when you’re getting a cruiser deck:
A kicktail
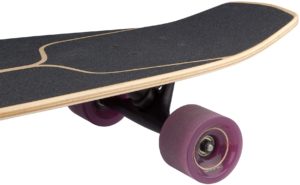
A kicktail is a very useful tool when you’re getting out and about on any skateboard, it allows you to be able to quickly change your direction, it also allows you to get off the floor and perform tricks such as the “ollie” or “kickflip.”
I find that the kicktail comes in extremely handy when I’m trying to kick my board up into my hand when I want to stop, although it usually just ends up Twatting my shin, and making me hate existence…
From personal experience, I think kicktails have more versatility when your boards are smaller and more maneuverable. You can perform more tricks, get higher pops, and just have a bit more fun in general when you can move your board around like a kite in the wind.
Plenty of concave
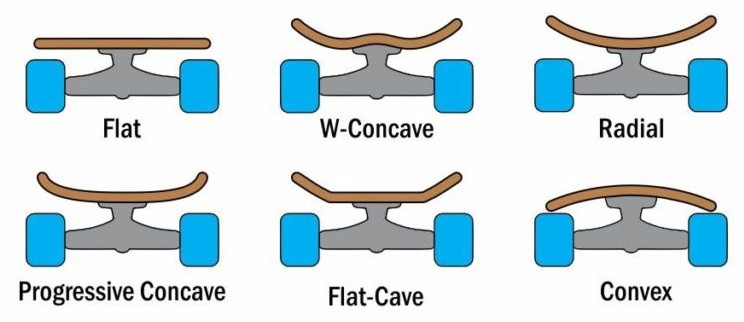
The amount of concave your deck has tends to make it more agile and sensitive to turns. For quicker, sharper turns, you’ll want to look for a board with a little more concave.
It’s not something that is 100% essential though, the amount of concave is never really a big issue that I’ve come across, but it’s something you’ll notice when you’re on the board, and definitely, a handy tool to have to perform tight turns.
decent build quality
Speaks for itself really, don’t get a shite deck and it won’t snap on you when you’re bombing it down a hill… This one, unfortunately, comes from experience, although I assume with me it was more ‘user error’ than anything else.
wheel wells
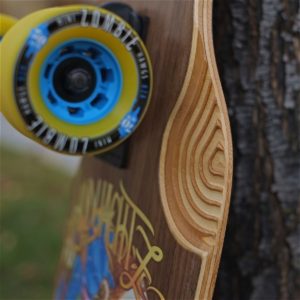
These are a feature that is much more common in longboards than most other skateboards you’ll use.
If you are new to straying out of the ‘norms’ of skateboards, or you haven’t managed to figure it out for yourself, these ‘wheel wells’ are a small groove cut out into the bottom of the deck, above where the wheels would sit, and allow you to turn sharply without your wheels eating into your deck… Much like a hungry beaver, although way less aggressive, I assume.
The Deck I Chose!

In my case, I chose a Ridge premium 22″ mini cruiser deck from eBay, It’s a plain deck with no grip tape or decals on the bottom. Some may say it’s boring, I would say it’s a blank canvas!
If you go for that, it will set you back £19.95 (as of writing this,) and I can tell you, I’ve had mine a few months now and it has worked an absolute charm!
Step 2. For Trucks Sake.
Sorry for the pun, but I can’t promise It won’t be the last.
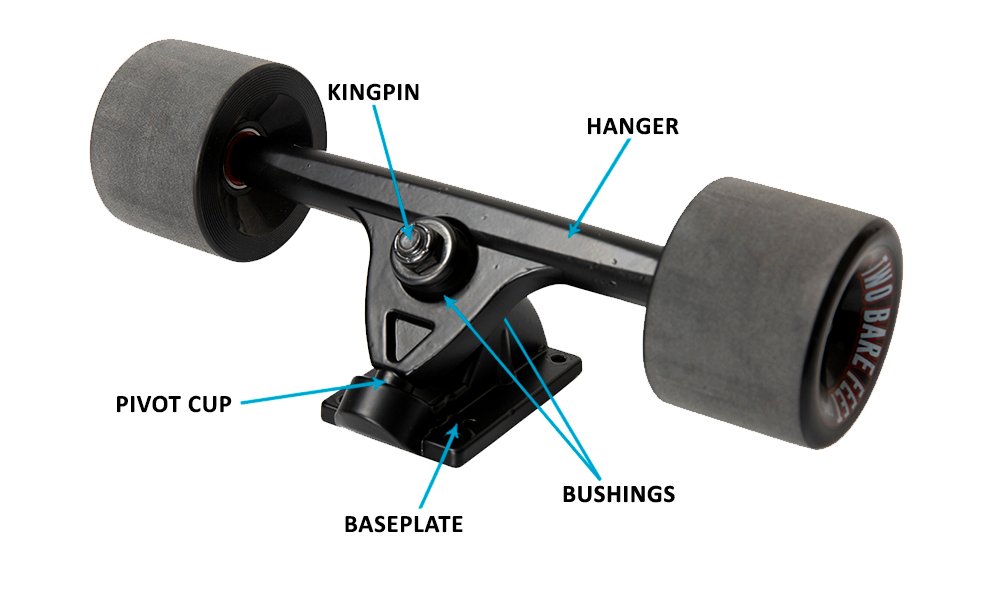
Think of the trucks as the engine and steering for your board, you want to find some fairly decent trucks, with semi-firm bushings (the little bits of rubber that sit in the trucks and act as a kind of suspension and shock absorber,) this will ensure your board runs smoothly from rail to rail… or side to side, depending on whether you’re a surfer or not.
One thing I would HIGHLY suggest is that you get yourself some LONGBOARD trucks… Skateboard trucks and Longboard trucks differ greatly, so double check before you buy!
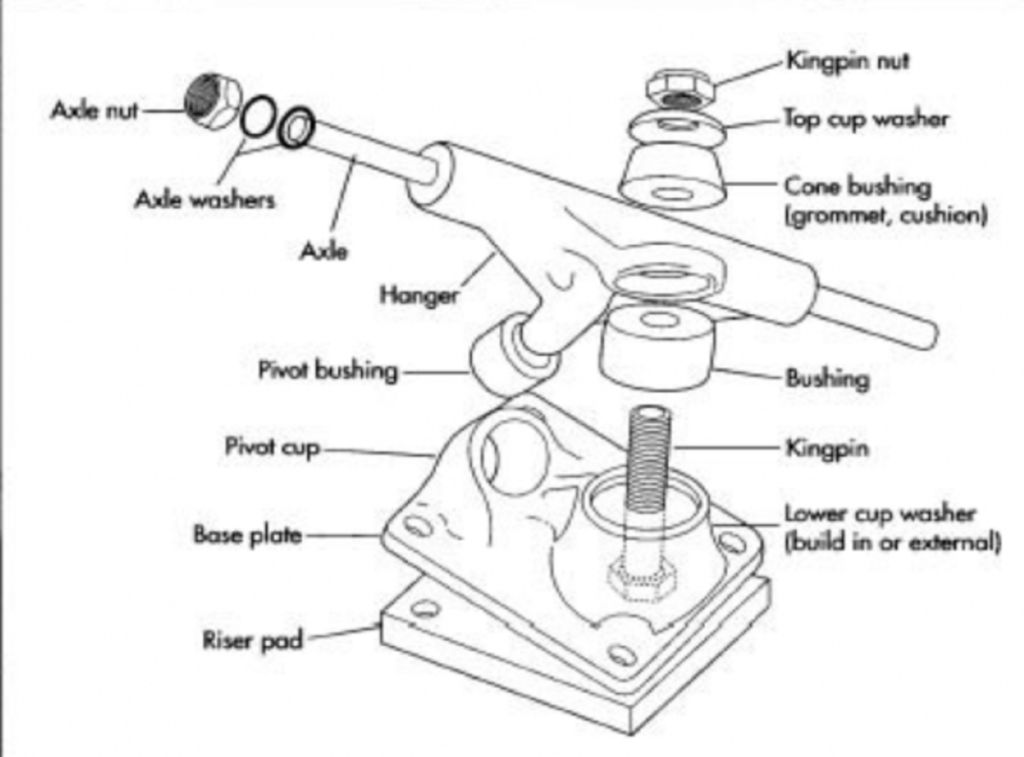
As this image indicates, the trucks are made up of multiple compartments, but for the sake of simplicity, most trucks you’ll buy will come with all of the bits-and-bobs you’ll need to get out into the street.
I added a set of riser pads to the base of my trucks, to increase the ride height of my board… Makes it a little bit more of a deathtrap, but I see it as a little more fun, (until I stack it and break my leg.) Risers are pretty cheap, and worth the investment if you want to jack up your ride ever so slightly!
Hardware is also a very important part of your truck setup, in that the hardware is the nuts and bolts that attach your trucks to the deck. A small but vital bit of kit.
Trucks can be one of the most expensive parts of your board setup, and I’ve also found that some sellers on Amazon are absolute con artists. For instance, there is a listing for NICE longboard trucks for £25.40, which seems great at face value, however upon further investigation, they only sell you ONE truck! So stay vigilant…
The one I’d recommend would be the “Caliber II 10″ 50 Degree Longboard Truck,” which retail for a reasonable £31.95 (not including shipping.)
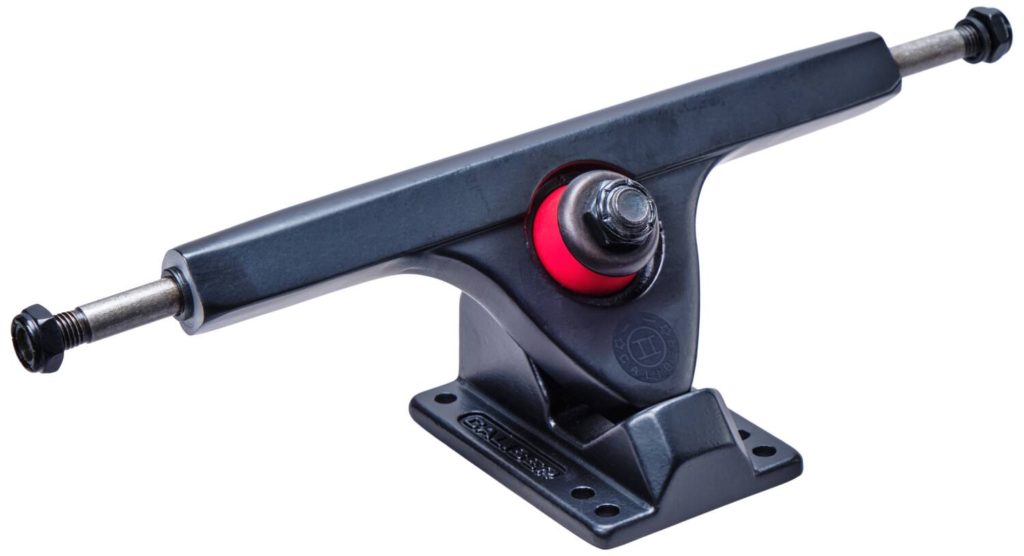
Unfortunately, they don’t come with the appropriate hardware to attach them to the deck, but they sent me a link to find them.
Click here to have a look at truck hardware (very important!)
Alternatively, have a look on eBay or Amazon and you can find them dirt cheap!
Step 3. Wheels & Bearings.
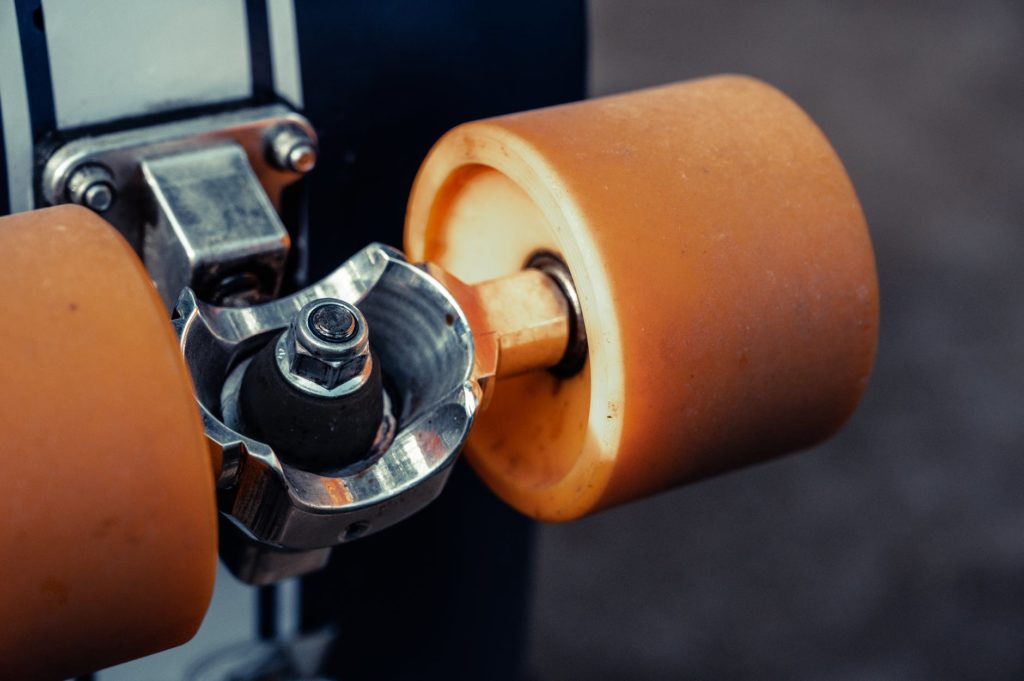
Next, you’ll need some wheels…
Depending on how you want your board to ride, you need to pick how tough you want your wheels to be.
The ‘toughness’ of a wheel is depicted by the Durometer number, which demonstrates and the hardness of softness of the wheel by giving it a specific number. The higher the number, the harder it is, (in vice-versa.)
If you like your board to be quite loose and have less traction, you want to go for a set of wheels with a lower durometer number. This type of wheel is much better for gliding over potholes and bumpy, uneven terrain. However, they aren’t as good at keeping speed as some of the tougher wheels you can get.
If you’re more interested in speed and powerslides, wheels with a higher durometer number are more your type, but be aware that the tougher the wheels are, the more of the road surface you will feel, which can make for a really unsatisfying ride!
For me, I picked some soft wheels to let me travel across rough ground much easier, plus I find it feels much more satisfying to ride. It is a little more difficult to powerslide, but I find it makes up for that with the fact you don’t feel every single bump, dip, and crack in the pavement!
Here is a really good video explaining longboard wheel choice if you aren’t so clued up on the topic!
A decent set of wheels that I would look at would be the “TOBWOLF 4PCS Skateboard Wheels” on Amazon. They are rather soft, with a durometer number of 78A, and also come with ABEC 9 bearings, but more about those in a second…
These wheels are 5.4cm in thickness, and 7cm in length, which is a decent size for the cruiser. The only issue is that the larger and heavier the wheels are, the fewer tricks you’ll be able to perform with them.
They aren’t the best wheels, but for a cheap option that definitely won’t disappoint, they are a good choice in my opinion, especially for the price!
Check the price on Amazon here!
Wheels are useless without bearings though, so you’ll want to grab a set of bearings aswell.
Some wheels come with bearings included, but I’ve found that the majority of these “all in one” sets have cheaper, less decent bearings, so generally I would suggest getting your own.
One thing you’ll see a lot while looking for bearings, is the ABEC ratings. The idea is, the higher the ABEC rating, the higher the speed capability, efficiency, and precision of the bearings. The ratings includes grades 1,3,5,7, and 9.
Generally, you want to look for higher ABEC ratings for a smoother and more enjoyable ride. They tend to get more expensive than the lower ratings, but in my opinion it is well worth the extra cash!
I suggest looking at these bearings…
Like I said before though, the wheels I recommended did come with ABEC 9 bearings included, so you may find for the time being to get the all-in-one package, and if you need to in the future, get some different ones. It all depends on how much you want to spend.
For maintenance and upkeep of your wheels, just give them a spray of WD-40 every now and again, and try to keep the bearings out of water for prolonged durations, as parts can rust, and nothing makes you want to cry more, than having a board that won’t move properly!
Step 4. Get a Grip…tape!
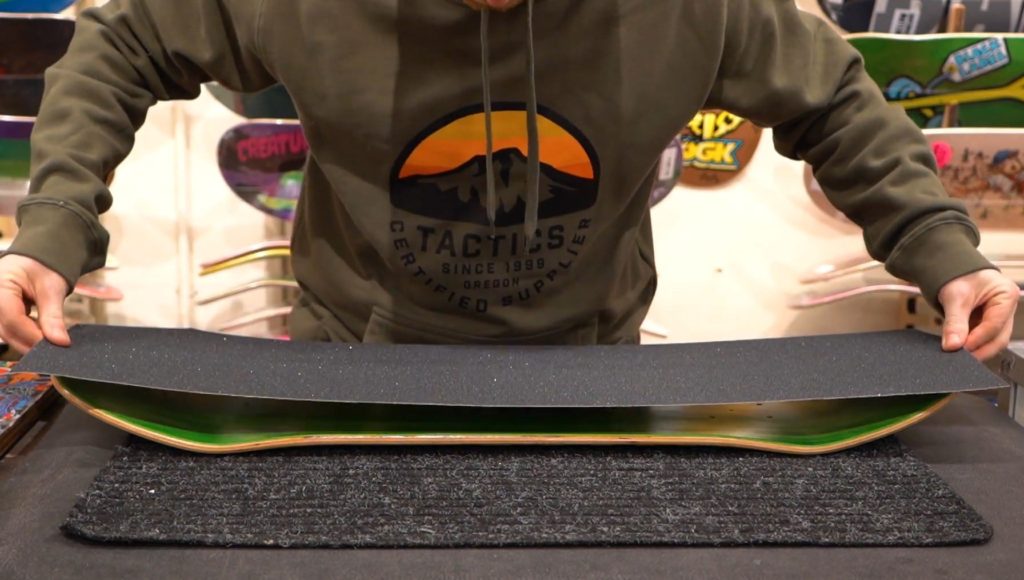
…Told you It wouldn’t be the last pun…
You can get grip tape extremely cheap, and also get it in many different colours and designs.
I went for clear grip tape as you can still see the wood through it, and I like the way it looks. Another added benefit of clear grip tape, is you can add images or stickers underneath the tape, which makes for a really interesting and unique design!
You don’t have to go for clear grip tape though, you can get it in all of the colours of the rainbow, and more!
I wouldn’t pay more than £10 when looking for grip tape though, you can get it extremely cheap from eBay, for instance, I got mine for £5.95 from eBay and it works a charm!
Click here to get cheap grip tape from eBay!
There is a bit of a NAC to get your grip tape on your deck properly, it does take some skill, tools and especially patience! I always struggle with this, as I have no skill or patience, but I’m sure you’ll be able to do a much better job than me…
The most useful tool to use for applying grip tape is a Stanley knife, more specifically, a Stanley blade!
Here is a quick video explaining how to properly apply grip tape to your deck!
Step 5. Tools & Accessories.
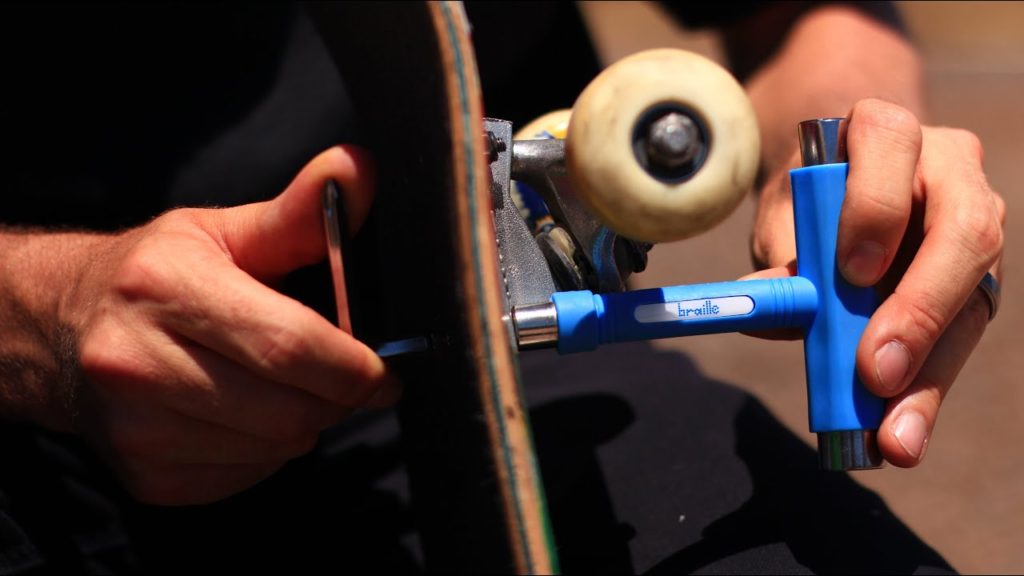
Now, because you’ve been difficult and decided to build your board from scratch, you need to make sure you have all the necessary tools to put it together properly!
If you have a decent tool kit anyway, you may be okay. All you need to assemble this board is a small flat/cross-head screwdriver, socket set, or spanner set, Stanley knife, and most of all, patience!
If you’re anything like me, you want things to get done as quickly and easily as possible. If that’s the case, I would urge you to get a cheap “skate tool” to help put your board together. It is a small, all-in-one tool that has everything you need for assembling your board, and fine-tuning all of the fiddly bits to make your board ride just as you want!
As I said earlier, you may want to get some WD-40 to keep everything running smoothly too, especially if you keep your board outside.
You can also grab yourself some grip tape cleaner from eBay, it’s basically just a big rubber block that you can use to remove dirt from your new, pristine grip tape.
Conclusion…
…God I need a haircut…
If you use these links and buy these individual products:
Ridge premium 22″ mini cruiser skateboard deck
Caliber II 10″ 50 Degree Longboard Trucks
TOBWOLF 4PCS Skateboard Wheels
As of writing this, your order total will come to around £76.34 (does NOT include shipping!)
Now, this is just a quick guide on how to build a deck similar to mine, as you can tell, I’m definitely no expert on the subject, but if you use this blog post as a guide, feel free to have a mooch around the interwebs looking for cheaper and better products to build your very own custom cruiser skateboard.
Alternatively, feel free to buy a ready-made cruiser board, but I think the experience and gratification of creating and assembling your own board is priceless, and will DEFINITELY give you a much higher sense of satisfaction when you get out into the streets on your custom cruiser skateboard!
If you decide to build your own board, let me know how it went in the comments section below this post, I’d love to share ideas with you and get a bit of a deeper insight on skating. Also, feel free to share this post, or even check out a few of my other posts if you’re interested!
Cheers for reading!
